Please select the object link below for more information on how to configure the object
Object |
Shared with other SmartSolve© Applications |
Required for SmartCAPATM |
Yes |
Yes |
|
Yes |
Yes |
|
Yes |
Yes |
|
Yes |
No |
|
Yes |
No |
|
Yes |
No |
|
No |
Yes |
|
Yes |
No |
|
Yes |
No |
No |
No |
Please see Exception Type under System Wide Setup.
Please see Numbering Scheme under System Wide Setup.
Please see Priority under System Wide Setup.
Please see Activity Types under System Wide Setup.
Please see Activity Signatures under Application Options Utility.
Please see Reference Types under System Wide Setup.
Please see Exception Resolution under System Wide Setup.
Who will your exception owners be? In SmartCAPATM an Exception Policy defines ownership of your exceptions. When you create your policies for exceptions, any fields in the exception can in fact drive your policy. If needed, you may define different exceptions owners for different areas, processes, or products which have been recorded in the exception.
NOTE: If the user who is recording the exception will become the owner, then there is no need to create this policy. |
Some Common fields which may drive ownership may include, but are not limited to:
· Client (Customer)
· Product
· Org Unit (Source of Failure)
· Category, Severity, or Priority (of Failure)
The following rights must be assigned to a user to manage or view Exception Policies:
Rights |
Description |
XPL_MANAGE |
Allows administrator to Add new Exception Policy, modify existing Policy, or delete Policies.
|
XPL_VIEW |
Allows user to access Exception Policy to View.
|
Please see Rights Group to assign Rights Groups to users.
Exception Type inheritance is used by policies/procedures when applying the policies and rules established for each exception. When the exception is recorded, the application reviews the policies and rules defined for that type.
When a general, product, process or customer exception is recorded, the application reviews the policy and rule defined for that type. If a policy or rule does not exist for that type, the application then reviews the policy and rules of the general exceptions.
Product, process and customer exceptions are all based on the General Exception type. These exceptions inherit all the properties of the general exception, and also contain their own unique properties. Additionally, the customer exception type inherits all the properties of the product exception type.
To write an Exception Policy, you must be familiar with writing a test condition in SQL using the un-translated field names of any of the exception template entries driving the policy. These SQL statements are not checked; therefore, human intervention is required.
The following are lists of translated and untranslated fields for exceptions:
Translated Field |
Untranslated Field |
Category |
QXP_CATEGORY |
Org Unit |
QXP_ORU_CODE |
Short Description |
QXP_SHORT_DESC |
Description |
QXP_DESCRIPTION |
Severity |
QXP_SEVERITY |
Priority |
QXP_PRIORITY |
Cost |
QXP_COST |
External Reference |
QXP_REFERENCE |
Reporter |
QXP_REPORTER_CODE |
Report Date |
QXP_REPORT_DATE |
Occurrence Date |
QXP_OCCURENCE_DATE |
Add Another |
Add Another |
Translated Field |
Untranslated Field |
Operation |
PXP_OPR_CODE |
Org Unit |
QXP_ORU_CODE |
Discovery/Plant Area |
PXP_PLA_CODE |
Part Number |
PXP_PRODUCT_CODE |
Lot Number |
PXP_LOT_NUMBER |
Change Level |
PXP_REVISION |
Qty Affected |
PXP_QTY_AFFECTED |
Number of Defects |
PXP_QTY_DEFECT |
Short Description |
QXP_SHORT_DESC |
Description |
QXP_DESCRIPTION |
Category |
QXP_CATEGORY |
Cost |
QXP_COST |
Severity |
QXP_SEVERITY |
Priority |
QXP_PRIORITY |
Cause |
QXP_ROOT_CAUSE |
Occurrence Date |
QXP_OCCURRENCE_DATE |
Reporter |
QXP_REPORTER_CODE |
Translated Field |
Untranslated Field |
Exception Type |
QXP_EXCEPTION_TYPE |
Part Number |
PXP_PRODUCT_CODE |
Change Level |
PXP_REVISION |
Org Unit |
QXP_ORU_CODE |
Unit Cost |
PXP_UNIT_COST |
Operation |
PXP_OPR_CODE |
Print Zone |
PXP_PRINT_ZONE |
Discovery/Plant Area |
PXP_PLA_CODE |
Lots for Primary Part |
ADDITIONALLOTS |
Lot Number |
EPL_LOT_NUMBER |
Lot Reference |
EPL_LOT_REFERENCE |
Qty Affected |
EPL_LOT_QTY |
Def Qty for Short Desc |
EPL_DEFECTIVE_QTY |
No. of Defs for Short Desc |
EPL_NO_OF_DEFECTS |
Category |
QXP_CATEGORY |
Short Description |
QXP_SHORT_DESC |
Description |
QXP_DESCRIPTION |
Severity |
QXP_SEVERITY |
Priority |
QXP_PRIORITY |
Cause |
QXP_ROOT_CAUSE |
Cost |
QXP_COST |
Cause Category |
PXP_FCC_CODE |
Reporting Site |
PXP_REPORTING_SITE_COC |
Occurrence Date |
QXP_OCCURENCT_DATE |
Reporter |
QXP_REPORTER_CODE |
Report Date |
QXP_REPORT_DATE |
Exception Reference |
EXCEPTIONREFERENCE |
Translated Field |
Untranslated Field |
Exception Type |
QXP_EXCEPTION_TYPE |
Client |
QXP_CLIENT_CODE |
Contact Code |
CMC_CODE |
Contact Name |
CMC_NAME |
Contact Type |
CMC_TYPE |
Title |
CMC_TITLE |
Street |
CMC_STREET |
Company |
CMC_COMPANY |
City |
CMC_CITY |
Phone |
CMC_PHONE |
State |
CMC_STATE |
Fax |
CMC_FAX |
Zipcode |
XMX_ZIPCODE |
CMC_E_MAIL |
|
Country |
CMC_COUNTRY |
Country of Origin |
QXP_CNTRY-OF_ORIGIN |
Occurrence Date |
QXP_OCCURENCE_DATE |
Originating Site |
QXP_ORIGINATING_SITE |
Incident Aware Date |
QXP_AWARE-DATE |
Reporter |
QXP_REPORTER_CODE |
Report Date |
QXP_REPORT-DATE |
Brand Name |
QXP_BRAND_NAME |
Catalog Number |
QXP_CATALOG_NUMBER |
Org Unit |
QXP_ORU_CODE |
Product Type |
PXP_PRODUCT_TYPE |
Part Number |
PXP_PRODUCT-CODE |
Unit Cost |
PXP_UNIT_COST |
Lot Number |
EPL_LOT_NUMBER |
Lot Reference |
EPL_LOT_REFERENCE |
Qty Affected |
EPL_LOT_QTY |
Mfg. Date |
EPL_MANUFACTURING_DATE |
Exp. Date |
EXPL_EXPIRATION_DATE |
Def. Qty for Short Desc |
EPL_DEFECTIVE-QTY |
No. of Defs for Short Desc |
EPL_NO_OF_DEFECTS |
Category |
QXP_CATEGORY |
Short Description |
QXP_SHORT_DESC |
Description |
QXP_DESCRIPTION |
Translated Field |
Untranslated Field |
Exception Type |
QXP_EXCEPTION_TYPE |
Category |
QXP_CATEGORY |
Severity |
QXP_XSV_CODE |
Priority |
QXP_XPR_CODE |
Operation |
PSP_OPR_CODE |
Product |
PXP_PRODUCT_CODE |
Plant Area |
PSP_PLA_CODE |
Organization Unit |
QXP_ORU_NAME |
Short Description |
QXP_SHORT_DESC |
Description |
QXP_DESCRIPTION |
1. From the Portal Page, click Smart Solutions tab > Admin and Report > Policy. Under Exception Policy, select an Exception.
The Exception Policies display.
2. Click Action > Add.
3. Enter information in the following fields:
Field |
Definition |
|
Exception Type |
Select the Type of Exception for which this Policy will apply to.
|
|
Test Sequence |
Enter Sequence Number (system looks from lowest to highest to meet requirement).
|
|
|---|---|---|
Test Condition |
Enter the Test Condition using the un-translated field name(s).
|
|
Test Description |
Enter a Test Description to explain what the test condition means, in laymen’s terms.
|
|
Owner Role |
Zoom to select the Owner Role.
|
|
Owner |
Zoom to select an Owner.
|
|
Add Another |
Click this box to add another exception policy.
|
|
4. Click the Save button.
Exception policies can be edited, deleted and managed by an administrator.
1. From the Portal Page, click Smart Solutions tab > Admin and Report > Policy. Under Exception Policy, select an Exception.
The object list displays.
2. Click
the ![]() icon to switch to Local view (if applicable).
icon to switch to Local view (if applicable).
3. Select the check box of the Policy to edit, then select Action > Edit from the main menu.
4. Edit any information for your policy.
5. Click the Save button.
All changes should now be reflected in the list.
1. From the Portal Page, click Smart Solutions tab > Admin and Report > Policy. Under Exception Policy, select an Exception.
The object list displays.
2. Click
the ![]() icon to switch to Local view (if applicable).
icon to switch to Local view (if applicable).
3. Select the check box of the Policy to delete, then select Action > Delete from the main menu.
4. Click the Save button.
The object has now been removed from the system.
How will your quality exceptions be resolved? In SmartCAPATM an exception rule may define what needs to happen with your problem. When you create your Rules for Exceptions, any fields in the exception can in fact drive these rules. You may define different rules for different types of exceptions.
Rules determine when the system will automatically take action. Auto Rules come with four actions to take in the system:
Action To Take |
Description |
None |
If the Test Condition is met (i.e., Severity = MEDIUM), no system action will be taken to the exception and it will remain open for the owner to pick up.
|
Close |
If the Test Condition is met (i.e., Severity = LOW), the exception will automatically be closed.
|
Require Issue |
If the Test Condition is met (i.e., Severity = High), the exception will not be able to be closed unless an issue is created or attached for further action.
|
Auto Create Issue |
If the Test Condition is met (i.e., Severity = High), an issue will automatically be created from the exception as soon as it is saved by the reporter.
|
To write an Exception Auto-Rule, you must be familiar with writing the test condition in SQL using the un-translated field names of any of the exception template entries that will drive the policy. These SQL statements are not checked; therefore, human intervention is required.
Some common fields which may drive Auto- Rules may include, but are not limited to:
· Client (Customer)
· Product
· Category
· Severity, or Priority (of Failure)
The following rights must be assigned to a user to manage or view Exception Auto Rules:
Rights |
Description |
QRL_MANAGE |
Allows administrator to Add new Exception Rule, modify existing Rule, or delete Rules.
|
QRL_VIEW |
Allows user to access Exception Auto Rule to View.
|
Please see Rights Group to assign Rights Groups to users
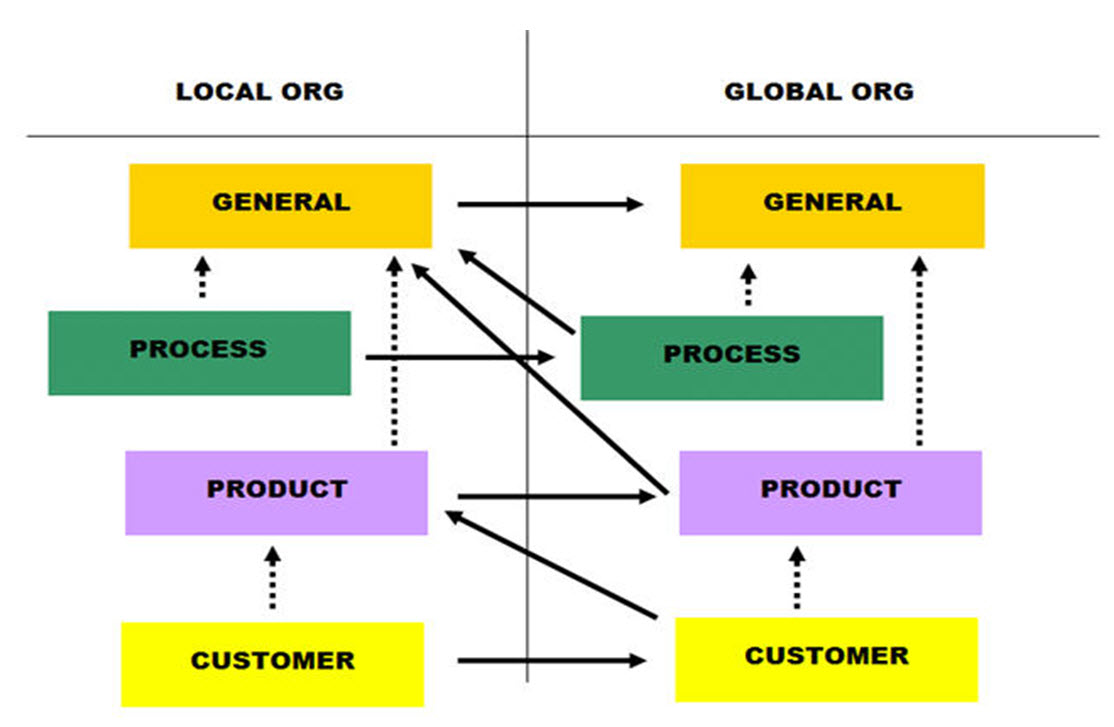
Please see Global vs. Local under Exception Policies.
1. From the Portal Page, click Smart Solutions tab > Admin and Report > Policy. Under Exception Auto-Rule, select an Exception Type.
2. Click Action > Add.
3. Enter information in the following fields:
Field |
Definition |
|
Exception Type |
Select the Type of Exception for which this Rule will apply to.
|
|
Test Sequence |
Enter Sequence Number (system looks from lowest to highest to meet requirement).
|
|
Test Condition |
Enter the Test Condition using the un-translated field name(s). Please see Writing the Policy for reference to untranslated field codes used in each Exception Type.
|
|
Test Description |
Enter a Test Description to explain what the test condition means, in laymen’s terms.
|
|
Action to Take |
Click the drop down list to select the Action To Take which include the following options:
|
|
Add Another |
Click this box to add another exception policy.
|
|
4. Click the Save button.
Exception Auto Rules can be edited, deleted and managed by an administrator.
1. From the Portal Page, click Smart Solutions tab > Admin and Report > Policy. Under Exception Auto-Rule, select an Exception Type.
The object list displays.
2. Click
the ![]() icon to switch to local view (if applicable).
icon to switch to local view (if applicable).
3. Select the check box of the Rule to edit, then select Action > Edit from the main menu.
4. Edit any information for your Rule.
5. Click the Save button.
All changes should now be reflected in the list.
1. From the Portal Page, click Smart Solutions tab > Admin and Report > Policy. Under Exception Auto-Rule, select an Exception Type.
The object list displays.
2. Click
the ![]() icon to switch to Local view (if applicable).
icon to switch to Local view (if applicable).
3. Select the check box of the Auto Rule to delete, then select Action > Delete from the main menu.
4. Click the Save button.
The object has now been removed from the system.
The Event Synchronization Agent (ESA) manages compliance with industry regulations and improves company performance by automatically capturing various Exception data from ERP Systems (i.e., SAP), customer relationship management (CRM) or other field and legacy systems by creating and updating Exception records, and notifying Exception managers. Captured data can be sent to the appropriate complaints group and additional information collecting, investigations, and reporting can be completed. Please contact your Pilgrim representative for ESA Integration options.