Criteria are sections/questions, objectives or checklists that are contained in Criteria records which are used to perform audits. Criteria is attached to an audit record in SmartAuditTM so that the auditor can complete the sections and questions and provide response. External documents which outline audit procedures or work instructions can also be contained in criteria records as attachments.
The criteria record dictates how end users interact with the criteria. The criteria record functions just as a dynamic document, and contains approval information, security, training requirements (which roles need to be trained on this criteria), retention policies for the life cycle of the Criteria Document, and many more functions. Using SmartAuditTM criteria, customers no longer have to manage their auditor’s checklists as paper documents. When a criteria record is attached to an audit record, the sections and questions automatically transfer over to the audit record so that the auditor can complete the questions and provide auditor findings and response.
Customers who use SmartAuditTM have used the criteria in many different ways. Consider the following configuration suggestions to fit your business needs for your implementation. Keep in mind that as you continue to use the SmartAuditTM system you may implement different options to manage your criteria.
Content Format |
System Configurations |
Auditor Checklist is Criteria (i.e., Word, Excel, etc.)
|
If using SmartDocTM or another EDMS system, check the checklist into SmartDocTM and for now link the Criteria Record to the Criteria Record using the References folder. Whenever an audit record is created and this Criteria record is attached, the criteria will transfer to the Reference folder of the audit record for access. Pros - Quicker audit system implementation as sections and questions do not have to be entered in the criteria record (may be entered later after SmartAuditTM go-live – Phase II). Cons - Auditor does not get to use online or offline form if using this method. Audit results must be attached to the audit record and notes requiring Action Plans must be re-entered in the Audit record so that exceptions can be created.
|
Auditor Checklist is Criteria
|
Sections and questions must be entered in the criteria record (remember you can copy and paste from ISO criteria in library and other Criteria Sections/Questions you have since created). Pros -Auditor can check out the data using online or offline form if using this method. Audit results and notes are automatically attached to audit record. Administrator does more work so end users don’t have to. Cons - Slower audit system implementation as sections and questions have to be entered in criteria record.
|
The following rights could be assigned to a user to manage or view criteria:
Rights |
Description |
APP_SUPERVISOR |
Allows user to Approve Criteria for any User.
|
CRI_CREATE |
Allows user to Create new Criteria.
|
CRI_DELETE |
Allows user to Delete Criteria.
|
CRI_EXPIRE |
Allows user to view Criteria that has a Status of EXPIRED.
|
CRI_INWORK |
Allows user to view Criteria that has a Status of INWORKS.
|
CRI_MANAGE |
Allows user to Manage Criteria that the user Owns and allows users to perform Criteria Reviews.
|
CRI_SUPERVISOR |
Allows user to Manage Criteria that any user Owns.
|
CRI_VIEW |
Allows user to View Criteria that has a Status of PRERELEASED, CURRENT, and PREEXPIRED.
|
DPT_VIEW |
Allows user to access Department to View and select.
|
CLI_VIEW |
Allows user to access Client to View and select (if applicable).
|
WRC_VIEW |
Allows user to access Work Center to View and select (if applicable).
|
STO_VIEW |
Allows user to access Standard Operation to View and select.
|
OPR_VIEW |
Allows user to access Operation to View and select (if applicable).
|
PRL_VIEW |
Allows user to access Product Line to View and select (if applicable).
|
PRT_VIEW |
Allows user to access Part to View and select (if applicable).
|
PLA_VIEW |
Allows user to access Plant Area to View and select (if applicable).
|
ACT_VIEW |
Allows user to access Actor to View and select.
|
ROL_VIEW |
Allows user to access Role to View and select.
|
Please see the Admin Guide to assign Rights Groups to users.
· Global Criteria will be inherited by all local organizations.
· Local Criteria will only be viewed and used within that local organization.
1. From the Smart Solutions tab on the Portal Page, select SmartAudit > Create Criteria.
The Criterion creation window displays.
2. Zoom from the Type field and select the Criteria Type which this Criteria will be grouped under.
Please see How to Create a Criteria Type.
3. Once the Criteria Type is entered click the Next button.
The Criterion creation window will display with the Criteria Type and suggested Criteria No. and Revision.
4. Enter information in the following fields:
Field |
Description |
Title |
Enter the Title of the criteria (i.e., ISO 9001 Standards).
|
Audit Duration |
Enter the Audit Duration. (This can later be changed when the Audit record is created.).
|
Response Type |
Enter the Response Type Please see Response Type Setup to configure Audit Question Response Types.
|
Organization Unit |
Zoom and select an Organization Unit for this criteria (if applicable). Please see Organization Unit Setup to configure Clients, Departments, and Work Centers.
|
Process |
Zoom and select an Operation or Standard Operation. Please see Standard Operations and Operations to configure Process.
|
Product |
Zoom and select a Product (if applicable). Please see Product Lines and Parts to configure Products.
|
Plant Area |
Zoom and select a Plant Area (if applicable). Please see Organization Unit Setup to configure Plant Areas.
|
Comment |
Enter Comment (Description of the Criteria).
|
5. Click the Save button.
The new Criteria record has been created.
The criteria detail is always the first information displayed when entering the criteria record. The following information is available:
Information |
Description |
Header
|
The header of the criteria record is always displayed at the top of the screen and contains the following information: Criteria Number – Unique number assigned to the criteria record (this cannot be changed). Status – The current status of the criteria (INWORKS, CURRENT, etc.). Criteria Type –Access the Criteria Type to view more policies on this document. Current Approval Status – For release review or effectiveness review (will say routed if review is in process). Title – Title of the criteria (can be modified if needed). Phase – User defined field that displays the current activities for the criteria while under the current workflow status (i.e., IN RELEASE REVIEW, IN PERIODIC REVIEW).
|
Ownership |
Each criteria record contains an owner who will be responsible for overseeing the activities within the Criteria Record (i.e., authoring the Criteria, managing approval, managing changes, etc.). Criteria ownership can be changed at anytime.
|
Organization Unit |
A business entity (Department, Customer, Supplier) can be tied to the criteria for better searching and change control management.
|
Product & Process |
A product and/or business/manufacturing operation can be tied to the criteria for better searching and change control management.
|
Plant Area |
A plant area is a user defined field used to identify additional criteria information that can be used for searching and change control management.
|
Review Group |
Review groups can be predefined at the Criteria Type. They display users who need to approve the criteria and can be changed at anytime from each criteria record.
|
Dates |
Prereleased Date – This is the date the criteria was released for training (if applicable). Effective Date – This is the date the criteria became CURRENT. Expiration Date – This is the date the criteria is due to expire (if an effectiveness review is scheduled). Once the Expiration Date is met, the Criteria Status remains CURRENT. However, you may have to explain to an auditor why it displays as CURRENT if the criteria has since expired. Date to Purge – User can set a date to run a report to see which expired criteria can be deleted from the system.
|
The following options are available within the criteria record and can be managed accordingly by a user with appropriate rights:
Criteria can be edited and deleted.
Criteria ownership can be changed at anytime.
Criteria can be revised.
Criteria can be copied.
Criteria must be released (made CURRENT) in order to be used in audits.
Criteria can later be attached to AdHoc Audits and Audit Programs.
Criteria can be expired so that it can no longer be used in audits.
1. From the Smart Solutions tab on the Portal Page, select SmartAudit > Find > Criteria.
The Criteria list displays.
2. Select the Criteria No. to enter the criteria record.
3. Select Action > Edit from the main menu.
4. Edit any information for the Criteria.
5. Click the Save button.
All changes should now be reflected in the Criteria.
Criteria can only be deleted from SmartSolve© if the criteria has not been attached to any SmartSolve© records. Only users with criteria delete rights can delete criteria.
1. From the Smart Solutions tab on the Portal Page, select SmartAudit > Find > Criteria.
The Criteria list displays.
2. Select the Criteria No. to enter the criteria record.
3. Select Action > Delete from the main menu.
4. Select Ok from the Confirm Delete Operation prompt.
The Criteria has now been removed from the system.
1. From the Smart Solutions tab on the Portal Page, select SmartAudit > Find > Criteria.
The Criteria list displays.
2. Select the Criteria No. to enter the criteria record.
3. Select Action > Change Owner from the main menu.
4. Zoom from the Criteria Owner field and select the new owner.
Only users with the role assigned can be applied as the owner.
See How to Change Criteria Owner Roles in criteria.
5. Click the Save button.
The Criteria Owner has now been changed.
Only users with criteria supervisor rights can change criteria owner roles.
1. From the Smart Solutions tab on the Portal Page, select SmartAudit > Find > Criteria.
The Criteria list displays.
2. Select the Criteria No. to enter the criteria record.
3. Select Action > Change Role from the main menu.
4. Zoom from the Owner Role field and select the new role.
5. Click the Save button.
The Criteria Owner Role has now been changed.
If criteria needs to be updated, users should maintain proper change control by creating a new revision of the criteria (the previous version will remain attached to the criteria record for retention and archiving).
1. From the Smart Solutions tab on the Portal Page, select SmartAudit > Find > Criteria.
The Criteria list displays.
2. Select the Criteria No. to enter the criteria record.
3. Select Action > New Revision from the main menu..
4. Click the Copy References check box to copy cross references.
Please see Criteria References.
5. Select the Copy Roles check box if you wish to copy over Training Requirements.
Please see Criteria Certification Information.
6. Click the Copy Content check box to copy sections and questions from the previous revision.
Please see Criteria Sections.
7. Click the Save button.
The new revision displays.
Criteria can be copied into a new criteria record to expedite the criteria creation process for criteria that have similar sections, or other information.
1. From the Smart Solutions tab on the Portal Page, select SmartAudit > Find > Criteria.
The Criteria list displays.
2. Select the Criteria No. to enter the criteria record.
3. Select Action > Copy from the main menu.
4. Click the Save button from the Copy Criteria window.
5. Click the Copy References check box to copy cross references.
Please see Criteria References.
6. Click the Copy Role check box to copy Training Requirements.
Please see Criteria Certification Information.
7. Click the Copy Content check box to copy sections and questions from the previous revision.
Please see Criteria Sections.
8. Click the Save button.
The new Criteria record displays.
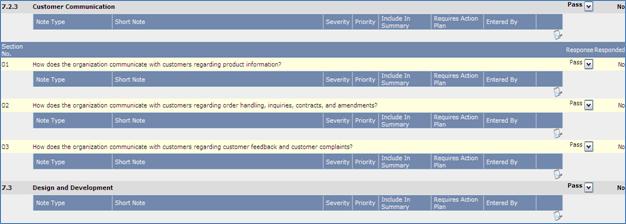
Sections and subsections are the primary content in a criteria record. Subsections are dependent on sections and must be responded to before the associated section can be signed off. Sections and subsections can contain the information necessary to perform an audit. Audit sections, subsections, and questions can be copied from other criteria which is maintained in the system.
Criteria can be copied into a new criteria record to expedite the criteria creation process for criteria that have similar sections, or other information.
1. From the Smart Solutions tab on the Portal Page, select SmartAudit > Find > Criteria.
The Criteria list displays.
2. Select the Criteria No. to enter the criteria record.
3. From the Criteria tree select Section.
4. Select Action > Add from the main menu.
5. Enter information in the following fields:
Field |
Description |
Number |
Enter the section number.
|
Title |
Enter the title of the section or subsection.
|
Objective |
Enter the objective of the section or subsection.
|
Response Type |
Select a Response Type for the section or subsection from the drop down list. Please see Response Type Setup to configure Audit Question Response Types.
|
Add Another |
Click this check box to add another section.
|
6. Click the Save button.
The new Section displays.
Questions and sub questions make up sections and subsections in a criterion or audit record. Like subsections, sub questions cannot stand alone; sub questions must be associated with a question
1. From the Smart Solutions tab on the Portal Page, select SmartAudit > Find > Criteria.
The Criteria list displays.
2. Select the Criteria No. to enter the criteria record.
3. From the Criteria tree select the Section or Subsection Number.
4. Select the Question tab.
5. Select Action > Add from the main menu.
6. In the Question window, enter information in the following fields:
Field |
Description |
Number |
Enter the question number.
|
Question |
Enter the question.
|
Response Type |
Select a Response Type for the question from the drop down list. Please see Response Type Setup to configure Audit Question Response Types.
|
7. Click the Save button.
Sections, Subsections, and Questions can be copied from other Criteria already defined in the system. There are two places in the system where Audit Criteria can be copied from and it is important to understand the difference between these two places:
Copy from the Criteria Library
This button is located under the Section List in the criteria record. The Criteria Library is not modifiable and contains the ISO 9001 2000 applicable Standard Audit Checklist. Pilgrim provides standard checklists in future releases of SmartAuditTM.
Copy from the Open Copying Sections > Questions List
The criteria that you configure for your Auditor Checklists can be copied into other criteria records as needed. The Criteria List can be accessed right from this criteria record by opening up a view using a feature called Custom Help Links.
To see how to setup custom help links please see Forms Designer.
From the criteria record a tool tip can be set up as seen below, for the Criteria No. field:
When the User selects the Criteria No. field, the system takes the user to the Open Criteria List in a new window. The user can then enter the criteria and follow the steps below to copy the criteria back to the original criteria record.
1. From the Smart Solutions tab on the Portal Page, select SmartAudit > Find > Criteria.
The Criteria list displays.
2. Select the Criteria No. to enter the criteria record.
3. From the Criteria tree select Section.
4. Click the Criteria Library button (or the custom link if you created a custom link) to locate the Criteria to copy.
5. From the criteria you are copying select the Section or Questions to copy.
6. Select Action > Copy from the main menu.
7. Close the Criteria Library.
You return to the main criteria record where the Sections | Questions will be copied.
8. Select Action > Paste from the main menu.
Sections and questions are copied to the criteria.
9. Edit new sections, subsections, and/or questions as needed.
Security can be setup by specific criteria by enabling the Work Group Access Only option. If Work Group Access Only is enabled, only users listed in the work group folder of the criteria record are able to view the criteria. The Work Group Access Only check box in the criteria record overrides the Criteria Type Apply Security setting when checked. Therefore, if the criteria record Work Group Access Only check box is checked, the roles and access rights defined under the Criteria Type > Securities folder no longer apply and only work group members can perform criteria functions.
1. From the Smart Solutions tab on the Portal Page, select SmartAudit > Find > Criteria.
The Criteria list displays.
2. Select the Criteria No. to enter the criteria record.
3. Select Action > Edit from the main menu.
4. Click the Work Group Access Only check box.
5. Click the Save button.
1. From the Smart Solutions tab on the Portal Page, select SmartAudit > Find > Criteria.
The Criteria list displays.
2. Select the Criteria No. to enter the criteria record
3. From the Criteria tree select Work Groups.
4. Select Action > Add from the main menu.
5. Enter information in the Work Group window:
Field |
Description |
Actor |
Zoom from the Actor field and select all actors who will have access to this criteria record.
|
Member Type |
Select the Member Type from the drop down list.
|
Allow Edit |
Click the Allow Edit check box to allow the actor to edit the criteria record.
|
Add Another |
Click this check box to add another work group.
|
6. Click the Save button
From the Reference folder in the criteria entry, you may attach any amount of reference criteria and/or SmartSolve© system records. The following Reference Types are available in the criteria entry:
Related – references which may have a brother-to-sister relationship.
Master/Sub – references which may have a parent-to-child relationship.
Deviation/Deviation Affected – used in SmartDocTM only. Please see Document References under the SmartDocTM End User Guide.
Fulfilled Criteria/Fulfillment Criteria – used in SmartTrainTM only. Please see Requirement References under the SmartTrainTM End User Guide.
The following references can be attached to the References folder of criteria and can be seen when zooming under the Document No. field when adding the reference:
Reference Type |
Description |
Document Tab
|
SmartDocTM Document records. SmartAuditTM Criteria records. SmartTrainTM Course records.
|
Record Tab |
SmartAuditTM Audit and Program records. SmartDocTM Change Order records. SmartCAPATM Issue records.
|
1. From the Smart Solutions tab on the Portal Page, select SmartAudit > Find > Criteria.
The Criteria list displays.
2. Select the Criteria No. to enter the criteria record.
3. From the Criteria tree select the References folder.
4. Select Action > Add from the main menu.
5. Enter information in the Reference window fields:
Field |
Description |
Document No. |
Zoom and select a Document No (this will be your Reference Document or Record).
|
Rev. |
Zoom to select a revision number.
|
Relation |
Select the Relation option.
|
Fixed Rev. |
Click the Fixed Rev check box if this relationship only applies for this revision of the reference. Even if a new Revision is created, this reference only stays at this revision.
|
Add Another |
Click this check box to add another reference. |
6. Click the Save button.
Once new criteria revisions are created in the system, the criteria author/owner can add as many Revision Notes as needed.
1. From the Smart Solutions tab on the Portal Page, select SmartAudit > Find > Criteria.
The Criteria list displays.
2. Select the Criteria No. to enter the criteria record.
3. From the Criteria tree select the Revision Notes folder.
4. Select Action > Add from the main menu.
5. Enter information in the Revision Note fields:
Field |
Description |
Note |
Enter a revision note.
|
Add Another |
Click this check box to add another revision note.
|
6. Select the Save button.
Each time a new revision is created and released for the criteria record, the system maintains a reference to all past revisions in the Criteria History folder for as long as you choose to retain the revisions. Typically only criteria owners and other designated users have access to EXPIRED Criteria records. Access is granted by giving these users special system rights.
1. From the Smart Solutions tab on the Portal Page, select SmartAudit > Find > Criteria.
The Criteria list displays.
2. Select the Criteria No. to enter the Criteria record.
3. From the Criteria tree select the Criteria History folder.
4. Click the Title of the criteria record to view.
The criteria displays in a new window.
Applicable Standards are the actual source names of industry standard checklists which can be referenced in criteria records.
1. From the Smart Solutions tab on the Portal Page, select SmartAudit > Find > Criteria.
The Criteria list displays.
2. Select the Criteria No. to enter the criteria record.
3. From the Criteria tree select the Applicable Standards folder.
4. Select Action > Add from the main menu.
Field |
Description |
Name |
Zoom and select the Applicable Standard to attach.
|
Add Another |
Click this check box to add another applicable standard.
|
5. Click the Save button.
The Standard has been attached to the criteria record.
If any criteria require an employee to be trained, the training requirements can be setup in the criteria record in the Certification Information folder using roles. Each employee assigned the specific role in the system will receive notification that they must read the criteria and sign-off on the requirement. Anytime new revisions are issued for the criteria; the employee will receive notification to read and sign-off on the new revision. The criteria training history for each employee can be viewed from the Internal Actor record in SmartAuditTM.
For more advanced features on document training, purchase Pilgrim’s SmartTrainTM application which integrates with SmartAuditTM.
1. From the Smart Solutions tab on the Portal Page, select SmartAudit > Find > Criteria.
The Criteria list displays.
2. Select the Criteria No. to enter the criteria record.
3. From the Criteria tree select Certification Information.
4. Select Action > Add from the main menu.
5. Enter information in the Role window fields:
Field |
Description |
Role |
Zoom and select all roles that need training on these criteria.
|
Override Defaults |
Click this check box to override defaults.
|
Activate Now |
Click this check box if the role has been added after the criteria has been made CURRENT. This immediately notifies any user who has this role to view and sign-off on this requirement.
|
Activate On Prerelease |
User will be notified once approval is complete and criteria is in a PRERELEASED Status.
|
Activate on Date |
User will be notified on this date to view and sign-off on this requirement.
|
Add Another |
Click this check box to add another role.
|
6. Click the Save button.
Roles have been added to the Certification Information folder.
It is necessary to perform Reviews in the criteria record in order to change criteria status. Reviews can be attached to the criteria record ad hoc by the criteria owner, or can automatically be attached to the criteria record when it is created by using a Criteria Review Model which is attached to the Criteria Type.
Changing Criteria Status
The following options are available for using Review Type to change Criteria Status:
From Status |
To Status |
Options |
INWORKS |
CURRENT |
Option 1 Criteria owner signs-off on the review while the criteria has a status of INWORKS. This option is typically used by customers. Option 2 Criteria owner routes the review to a review group who then signs-off on the review while the criteria has a status of INWORKS. This Review Type is set to auto-close for both options above so that upon approval status of criteria will change to PRERELEASED once the criteria has an approval status of APPROVED. Once Effective Date is met in the criteria, the status will automatically change to CURRENT using SmartCommTM.
|
CURRENT |
EXPIRED |
Option 1 Criteria owner uses the Auto Expire option in the criteria record to expire the criteria by bypassing the Final Review to Expire. This option is typically used by customers. Option 2 Criteria owner signs-off on the review while the criteria has a status of CURRENT. Option 3 Criteria owner routes the review to a review group who then signs-off on the review while the criteria has a status of CURRENT. For Options 2 and 3 above, upon approval, the criteria owner will make the decision to manually close the review. The criteria owner determines if criteria will remain CURRENT by scheduling another review based on approval decision, or expire the criteria by closing the review if decision is made to expire the criteria. If no further review is required, the status of criteria will change to PREEXPIRED when the review is closed. Once expiration date is met in the criteria, the status will automatically change to EXPIRED using SmartCommTM.
|
If no Review Model is attached to the Criteria Type, then the criteria owner may attach Review Types ad hoc to the Reviews folder. This is not the recommended approach as you will cause more work for your criteria owners by not pre attaching the Review Type through the Review Model.
1. From the Smart Solutions tab on the Portal Page, select SmartAudit > Find > Criteria.
The Criteria list displays.
2. Select the Criteria No. to enter the criteria record.
3. From the Criteria tree select Reviews.
4. Select Action > Attach from the main menu.
5. In the Review window, enter information in the following fields:
Field |
Description |
Review Type Name |
Zoom and select the Review Type to be attached to this criteria.
|
Interval |
If this is a Periodic Review enter an interval.
|
Advance Notice |
If this is a Periodic Review enter an advance notice.
|
Phase |
Select a phase from the drop down list.
|
Add Another |
Click this check box to add another review.
|
6. Click the Save button.
The Review Type is now attached to the criteria.
7. In order to view the Review Type from the tree, click the Refresh link at the top of the criteria tree.
The new review displays under the Active Review folder in the criteria tree.
NOTE: If the review does not display as active, confirm that the attached review type has the same Applicable Status as the status of the criteria. |
Review Types would only be modified if the target date, interval, or advanced notice time for the review needs to be changed. This is most often used for periodic reviews which may be attached to the criteria (most customers do not configure this Review Type).
1. From the Smart Solutions tab on the Portal Page, select SmartAudit > Find > Criteria.
The Criteria list displays.
2. Select the Criteria No. to enter the criteria record.
3. From the Criteria tree select the Reviews folder.
4. Select the check box of the Review Type to edit, then select Action > Edit from the main menu.
5. Change any options needed for the Review Type.
6. Click the Save button.
The Review Type has now been modified.
Review Types can only be deleted from the criteria record if they have not been activated (the Applicable Status of the Review Type cannot match the status that the criteria is currently in). You must Abort Active Reviews if this is the case.
1. From the Smart Solutions tab on the Portal Page, select SmartAudit > Find > Criteria.
The Criteria list displays.
2. Select the Criteria No. to enter the criteria record.
3. From the Criteria tree select the Reviews folder.
4. Select the check box of the Review Type to delete, then select Action > Delete from the main menu.
5. Click the Save button.
The Review Type has now been removed from the system.
1. From the Smart Solutions tab on the Portal Page, select SmartAudit > Find > Criteria.
The Criteria list displays.
2. Select the Criteria No. to enter the criteria record.
3. From the Criteria tree select the Active Review folder.
4. Add approvers if applicable or click on the Start button to route the Criteria.
The Approval Status now specifies ROUTED.
1. From the Smart Solutions tab on the Portal Page, select SmartAudit > Find > Criteria.
The Criteria list displays.
2. Select the Criteria No. to enter the criteria record.
NOTE: Review can also be accessed from Items Need Approval – Criteria on the Things To Do List of the Legacy Portal dashboard. |
3. Select the Criteria Active Review folder.
Approval routing tab information displays showing a list of approvers.
4. Select the Signature tab.
5. Click the check box of the approver to sign-off for, then click Action > Sign-off.
The approval sign-off window displays.
6. Enter the appropriate approval status (APPROVED or REJECTED.)
7. Enter a Sign-off Comment.
8. Enter Password.
9. Click the Save button.
The transaction for this approver is now complete.
In the event that the review is not set to Auto Close the criteria owner must manually close the review once all approvals are completed.
1. From the Smart Solutions tab on the Portal Page, select SmartAudit > Find > Criteria.
The Criteria list displays.
2. Select the Criteria No. to enter the criteria record.
3. From the Criteria tree select Active Review.
The Approval Routing tab information displays showing a list of approvers.
4. Select the Review tab.
5. Select Action > Close from the main menu.
6. Enter the Review Note.
7. Select the option No Further Review Required only if this review is to close and not be performed again in the criteria record.
8. Enter Target Date, Interval, and Advance Notice only if you are scheduling another Review.
9. Enter the Password.
10. Click the Save button.
The review now has a status of CLOSED and history of the review can be accessed by left clicking in the Review Name under the Reviews folder of the criteria tree.
Reviews are aborted by closing them without getting approval signatures. Reviews are typically aborted if another review needs to be performed in place of the aborted review.
NOTE: Aborting a Review Type does not change the criteria status; therefore, even if you abort a review, you still need to attach another review if the review is needed to change the status. |
1. From the Smart Solutions tab on the Portal Page, select SmartAudit > Find > Criteria.
The Criteria list displays.
2. Select the Criteria No. to enter the criteria record.
3. From the Criteria tree select the Active Review folder.
Approval Routing tab information displays showing a list of approvers.
4. Select the Review tab.
5. Select Action > Close from the main menu.
6. Enter the Review Note.
7. Enter the Password.
8. Click the Save button.
The review now has a status of ABORTED and history of the review can be accessed by left clicking in the Review Name under the Reviews folder of the criteria tree.
The criteria owner can use the Auto Expire option in the criteria record in order to bypass performing a review to change the criteria status. This option is typically used by customers.
1. From the Smart Solutions tab on the Portal Page, select SmartAudit > Find > Criteria.
The Criteria list displays.
2. Select the Criteria No. to enter the criteria record.
3. Select Action > Change Expiration Date from the main menu.
4. Enter the Expiration Date when the criteria will expire and check the Auto Expire option.
Once expiration date is met in the criteria, the status will automatically change to EXPIRED using SmartCommTM.