In order for your quality system to better manage Org Unit (Client, Department, and Work Center) processes, the Operation tables can be utilized in the SmartSolve© application. An operation can be any specific tasks/skills/jobs performed within an Org Unit which can later be associated with that Org Unit for quality purposes. For example, which process within our Department failed and what can we do within our department to correct or prevent the failure from recurring? An Operation is sometimes referred to as a Process in a SmartSolve© record.
Operations are used in any of the following SmartSolve© solutions:
SmartSolve Solution |
Required |
SmartAuditTM |
Yes |
SmartCAPATM |
Yes For Process Exceptions Only |
SmartComplaintsTM |
No |
There are two setup tables for Process: Standard Operations and Operations.
Standard Operations and Operations can be reused across different Org Units.
You do not have to attach Operations to an Org Unit Operation tab in setup. It is for informational purposes only.
If you decide to create Operations for Org Units, you do not have to use both Process objects (Standard Operation and Operation); however, if you decide to use only one, then make sure it is the Standard Operation object (since Operation requires a Standard Operation to be attached).
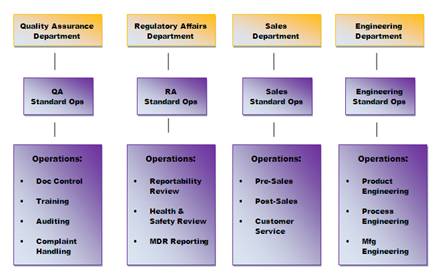
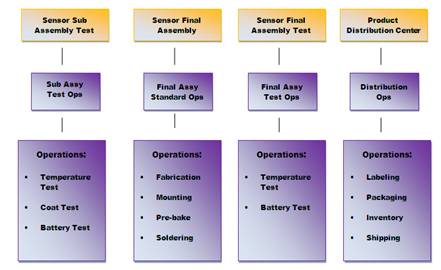
Since a standard Operation refers to a common process that encompasses lower level Operations with slightly different characteristics; it is quite common for Pilgrim customers to name the Standard Operation as the Org Unit (i.e., QA Operations, Engineering Operations, etc.). This is sometimes the format preferred if you will use both the Standard Operation and Operation objects.
Operations are required for the SmartAuditTM application (Departmental/Process Audits) so make sure you work with your company Internal Audit Teams if applying Operations to Org Units for other SmartSolve© applications.
The following Rights must be assigned to a user to manage or view Operations:
Rights |
Description |
STO_MANAGE |
Allows administrator to add new object, modify existing object, or delete object |
STO_VIEW |
Allows user to access object to view and select. |
OPR_MANAGE |
Allows administrator to add new object, modify existing object, or delete object |
OPR_VIEW |
Allows user to access object to view and select. |
Please see Rights Groups to assign Rights Groups to users.
· Global Standard Operations | Operations will be inherited by all Local Organizations.
· Local Standard Operations | Operations will only be viewed and used within that Local Organization.
1. From the Portal Page, click Smart Solutions tab > Admin and Report > Setup. Under Process select Standard Operation.
The Standard Operation list displays.
2. Select Action > Add from the main menu.
3. Enter Code and Name of your Standard Operation.
4. Click the Save button.
The new Standard Operation has now been added to the Standard Operation list and the Detail of the Standard Operation displays.
See Failure Mode Setup under the SmartCAPATM Setup Guide.
1. From the Portal Page, click Smart Solutions tab > Admin and Report > Setup. Under Process select Operation.
The Operation list displays.
2. Select Action > Add from the main menu.
3. Enter Code and Name of your Operation.
4. Zoom and select a Standard Operation.
5. Click the Save button.
The new Operation has now been added to the Operation list and the Detail of the Operation displays.
See Failure Mode Setup under the SmartCAPATM Setup Guide.
The following options are available within the Standard Operation and Operation objects and can be managed accordingly by an administrator:
· Standard Operations and Operations can be Edited and/or Deleted.
· Standard Operations and Operations can be attached to Org Units (Clients, Departments, and/or Work Centers).
1. From the Portal Page, click Smart Solutions tab > Admin and Report > Setup. Under Process select Standard Operation or Operation.
The object list displays.
2. Click
the ![]() icon
to switch to Local view (if applicable).
icon
to switch to Local view (if applicable).
3. Select the check box of the Standard Operation or Operation to edit, then select Action > Edit from the main menu.
4. Edit any information for your Standard Operation or Operation.
5. Click the Save button.
All changes should now be reflected in the list.
Standard Operations or Operations can only be deleted from SmartSolve© if the Operation has not currently been attached to any SmartSolve© records.
1. From the Portal Page, click Smart Solutions tab > Admin and Report > Setup. Under Process select Standard Operation or Operation.
The object list displays.
2. Click
the ![]() icon
to switch to Local view (if applicable).
icon
to switch to Local view (if applicable).
3. Select the check box of the Standard Operation or Operation to delete, then select Action > Delete from the main menu.
4. Click the Save button.
The object has now been removed from the system.